Showing posts with label 12 days of Whimsy. Show all posts

Tuesday, 13 December 2011

Final day of the 12 days of Whimsy - Festive Holly Bunting

Hello! Yesterday was the last day of the 12 days of Whimsy over at Sugar Lump Studios and I finally got around to making my Festive Holly Bunting tonight.


I used Kraft card which I embossed with a snowflake folder to make the bunting panels and then added patterned papers from my stash which I cut into pennant shapes.


The letters are a free font from Dafont and the images and holly are from the Graphics Fairy.

The lace I used is from The Ribbon Girl. I hope I have made it in time to link up the Project on the Sugar Lump Studios blog!
Have a good evening!
Jane
x

Sunday, 11 December 2011

12 days of Whimsy - Day 9, 10 and Day 11 Projects

Hello again, I am back with my latest 12 days of Whimsy Projects. I can't believe tomorrow is the last day! I have had so much fun trying these mixed media Projects and have learnt a lot.

For day 9, I made a tag which I inked with distress inks and then stamped with a Hero Arts stamp before spraying with glimmer mist. I love the effect the glimmer mist gave to the stamped background. I layered up muslin and lace and also added lace to the bottom of the tag using my sewing machine.

LinkI die cut and stamped and inked a smaller tag which I added on top of the lace and a photo from the Graphics Fairy which I mounted on to a scalloped circle cut from a book page. I finished with buttons, some silver leaf sprigs and buttons and a flower from Primark.

Day 10 was one of my favourit projects to make. I bought a cheap hardback book from a hardware store and covered it with stripey paper and then embellished it with music paper, a vintage postcard and stamp and a die cut heart which I inked and covered in chunky glitter. The photo corners which were embossed with silver powder are from Quixotic paperie and the lace was tea dyed as it was a horrible blue and white. The buttons were from a charity shop.


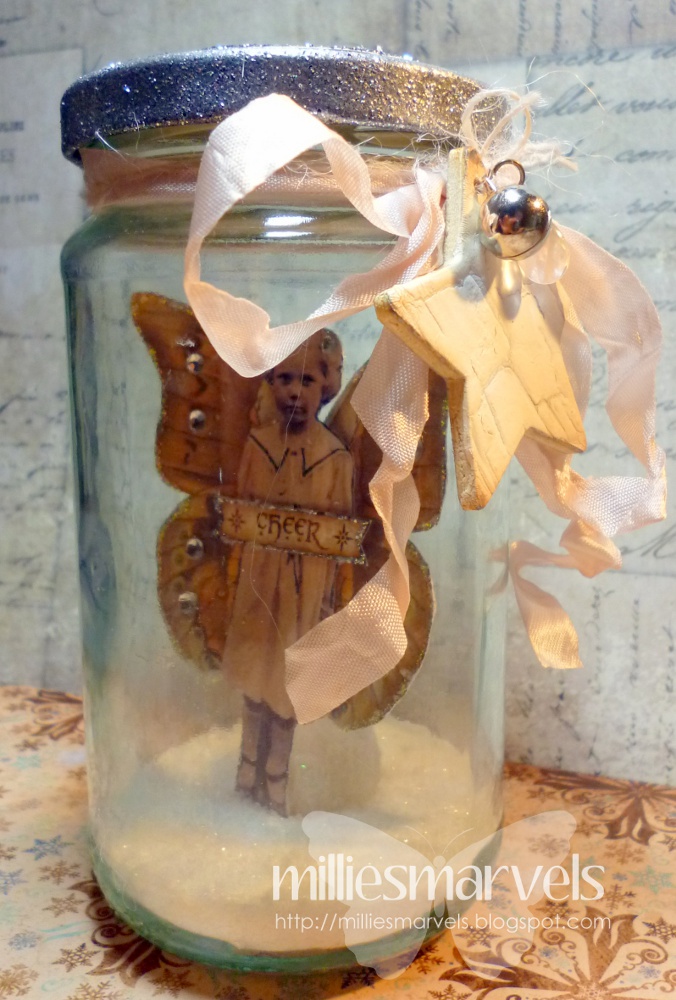
Today's project was great fun! Luckily, I had made my boys Chili con carne last night so I had a jar ready and waiting to be used. It had a black lid, so I heat embossed it with silver powder to make it pretty! The images I used are from The Graphics Fairy and I used flower soft for the snow.

I added music paper to the lid and a wooden snowflake topped with a pearl button and silver glitter glue around the edges of the die cut circle.

As a finishing touch, I added a seam binding bow and a wooden heart painted with distress paints, a little bell and a chandelier crystal. I can't wait to see what tomorrow's Project will be, although I am a little sad the 12 days are nearly over...
Enjoy your Sunday evening!
Jane
x

Thursday, 8 December 2011

12 days of Whimsy - Day 7 and Day 8 Projects

Good Morning Everyone! I hope you are all well, I am so glad it is Friday!! I had a bussy evening yesterday catching up with the 12 days of Whimsy tutorials from Nancy at Sugar Lump Studios.
I was really excited yesterday to find out that my name had been drawn and I won a voucher to spend in the Paperwhimsy shop! I am really looking forward to spending it on a gorgeous download!
I really enjoyed making the project from day 7 as it gave me the opportunity to use some lace scraps which my friend Petra gave to me a few weeks ago, these were very precious scraps as they were left over from her Daughter's beautiful handmade wedding dress.

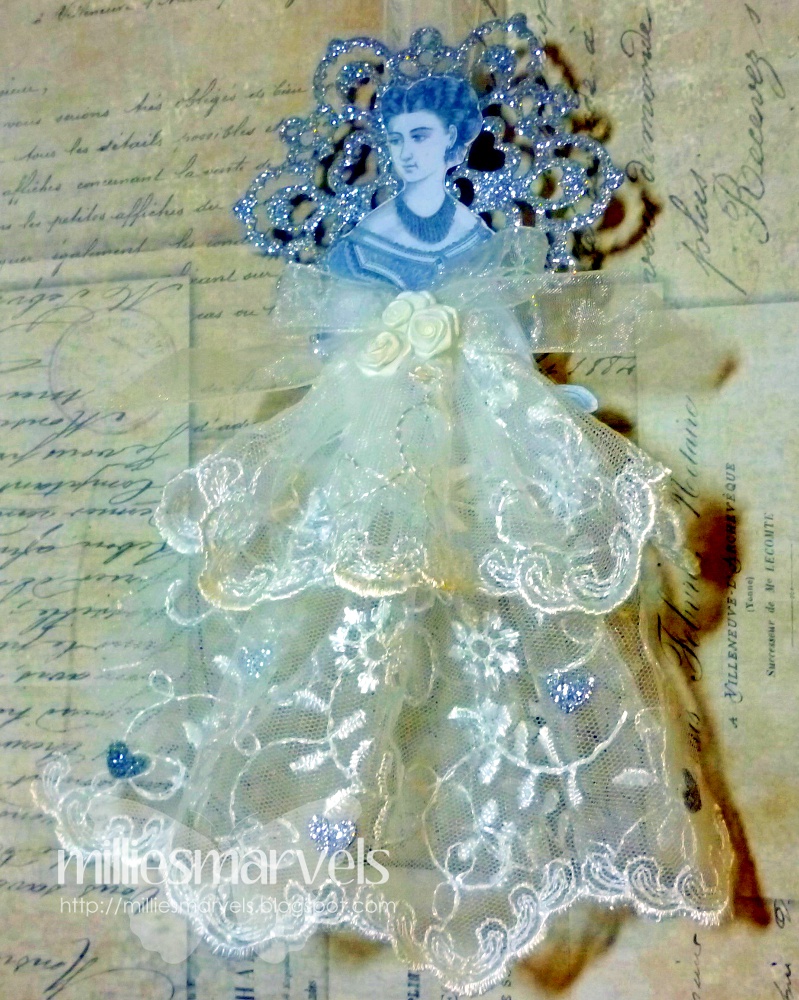
I used a Graphics Fairy image for my Frosted Snow Angels and added the gathered lace with my glue gun. The flowers are satin and have been in my stash for ages. I have been collecting vintagey bits and pieces for ages and have used so many of them for the 1st on the 12 days of Whimsy projects!
Here is a close up, you can see the Angel wings which were cut from glitter card with a Marianne Designs snowflake die. I added some of the hearts from the die cut to the Angel's dress. This gorgeous Angel will be going on my tree this year!
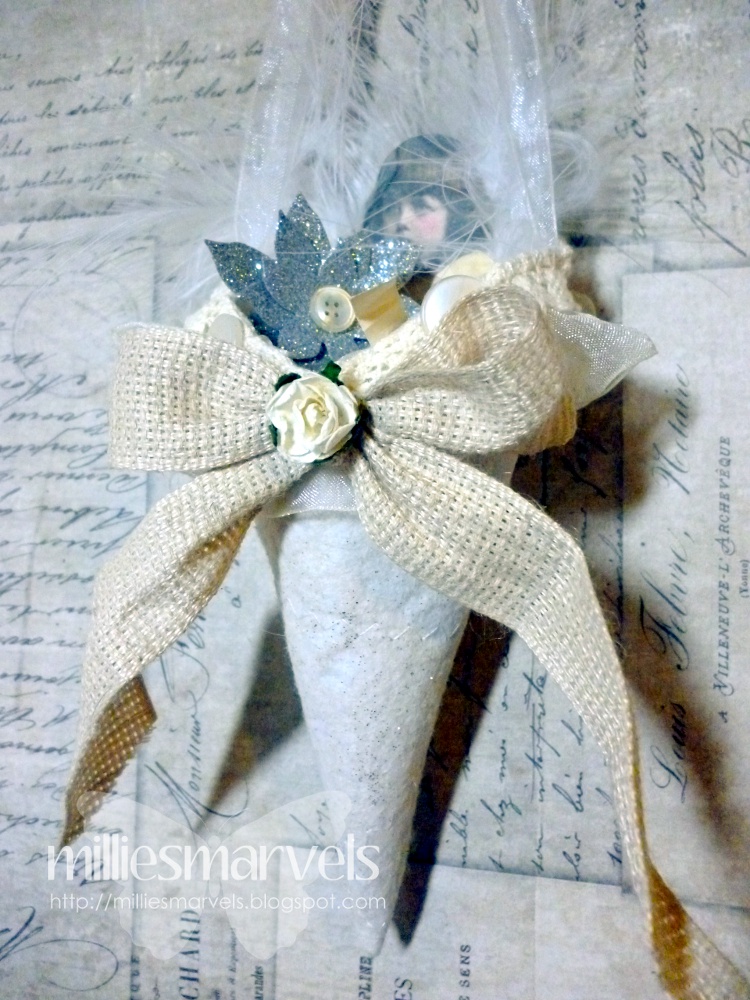
On day 8, Nancy showed us how to make some Frosty Victorian cones. I tea dyed some more felt for these and then added stitching around the edges and zig zag stitching on the circle.

After shaping the felt into a cone, I stitched organza ribbon and lace around the top of the cone and added vintage buttons on top. I tied a bow from some cream cotton ribbon and added it to the front of the cone and added a flower on top.

The image I used is from this website and I added feathers taken from cheap and naff Christmas decorations I picked up for 50p in the Supermarket this week and a bow at the bottom of the image before adding it to the back of the cone. As a finishing touch I added some glitter to the felt cone and a loop from organza to hang the cone on my tree. I filled the cone with shredded music paper and a flower cut from a Whiff of Joy die.
I am really looking forward to seeing what tomorrow's whimsical project will be!
Jane
x

12 days of Whimsy -Day 6 Project

Hello Again! As promised yesterday, I am back with my 6th day of Whimsy Project.
The tutorial was to make Yuletide tin ornaments and I have had to adapt it a bit as I didn't have any tins and I couldn't find any to buy locally either so I used some square Kraft boxes I had at home instead.
I started off with the larger box and made this painting it with Tim Holtz distress ink and adding Prima papers which I distressed and an image from this website with one of Nancy's banners. The lace and tinsel were from my stash.

I used a Snowflake die to cut the shapes above the banner and the image was edged with glossy accents which I covered in chunky glitter (I got very messy!!)

You can just see the crackle paint and lace on this photo, I also added an organza bow and button on the edge of the box to disguise the join in the lace.
I couldn't stop at just one so I also decorated a smaller box, in a similar way with My Mind's Eye papers this time and with glitter glue to edge the image and a small rose added. I painted the box with acrylic paint and distressed it with ink to age it.

The lace is much fuller and longer on this box and I had to stretch it to get it to fit around the box.
I added a bow on the front of this one. I am not sure which one is my favourite...I already have some bits gathered for the project from Day 7 and rather spookily bought some feathers yesterday and they feature in today's project so I may attempt both of them tonight.
Enjoy the rest of your Thursday!
Jane
x

Wednesday, 7 December 2011

12 days of Whimsy - Day 4 and Day 5 Projects

Hello Everyone, I hope you had a good day. I have some more Projects tonight inspired by the 12 days of Whimsy tutorials which Nancy is holding over at Sugar Lump Studios.

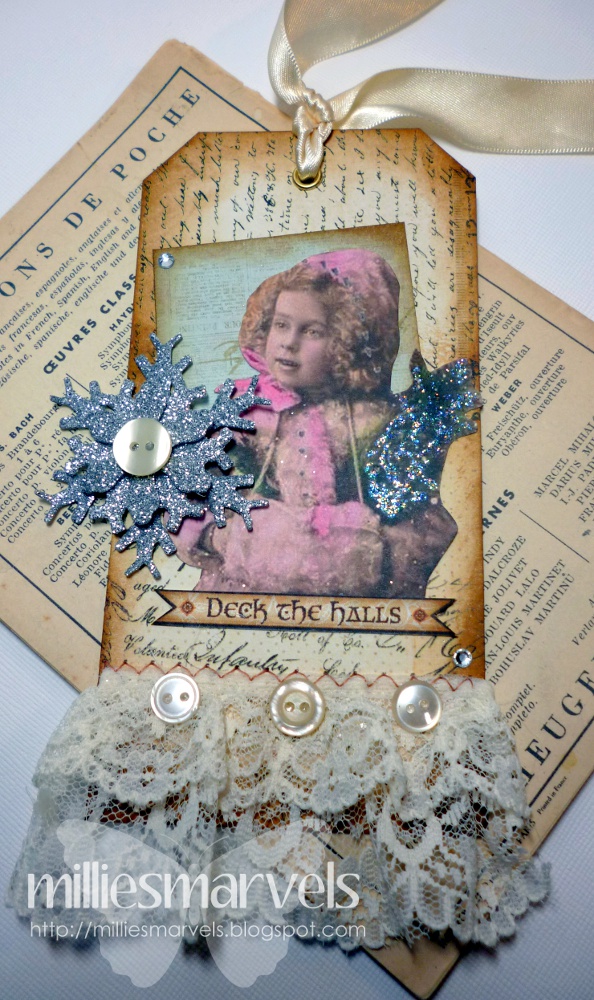
On day 4, Nancy showed us how to make some gorgeous Christmas tags. I used Prima papers to cover my tag and distressed them with Tim Holts inks. The image I used is from The Graphics Fairy and I printed it quite large and cut it out before adding it to the tag. The lace was bought from a Charity shop in the summer and the buttons are from my stash. I cut the snowflake using a Spellbinders die and the satin ribbon is from The Ribbon girl. I also used one of Nancy's Yuletide sentiments on the tag. I am really pleased with how the tag turned out and will probably hang it somewhere in my Living Room this Christmas.


The project for day 5 was lots of fun to make and I got totally covered in glitter! Nancy showcased some gorgeous Sparkly snowflake cards and I made my own sparkly snowflake by heat embossing a wooden snowflake twice with sparkly silver embossing powder and then sprinkling it with chunky silver glitter while the powder was still molten.


I used another of Nancy's yuletide sentiments for the card, papers by My Mind's Eye and lace and buttons from my stash. The image is from this website. I hope you are enjoying seeing something a little bit different from me, I am really having fun learning to make all these vintage inspired gifts and it is great getting messy and trying new styles. I will be back tomorrow with the project for Day 6.
Have a great evening!
Jane
x

Tuesday, 6 December 2011

12 Days of Whimsy - Day 2 and Day 3 projects

Hello again! I am back with another post to share some of the 12 days of Whimsy projects I have been making following Nancy's Wonderful tutorials. I am having so much fun taking part and can't wait to get started on the next 3, I have some catching up to do!
On the 2nd day of the 12 days of Whimsy Nancy showed us how to make some beautiful Victorian Pennants. I used images from this website to add to my pennants which were cut from music sheets mounted on card using a Spellbinders pennant die. I cut some triangles from Prima papers and sewed around the edges and added lace behind before adding them to the music sheet pennants.


I added torn and distressed scraps of music sheet to each pennant and then added the photo which was die cut with a Spellbinders die.

I added paper flowers on each pennant and lots of gems and a little glitter.

I die cut snowflakes from gridded cream note card paper and layered them each before topping with a button and covering in glitter glue.

I strung the finished pennants onto some cream organza ribbon ready to hang for Christmas.

For the 3rd day of Whimsy, Nancy showed us how to make some beautiful lace mittens. I love using my machine for sewing on cards but never use it for fabric anymore so this was a real treat!


To make the mittens, I cut some felt using the template provided by Nancy and then soaked the felt (as it was a bit bright) and some lace in tea. When I was happy with the colour, I rinsed them well and dried them with my heat gun which made the felt lovely and fluffy, just how I wanted it.
I added layers of lace to the top piece of the mitten, tacking them on with my machine and then added another image which I had printed onto fabric.

I added buttons and beads by hand and a vintage seam binding bow and a little loop to hang the mitten before hand sewing the back and front of the mitten together. I have left the top open as I may use it to put a gift in this Christmas or maybe fill it with lavender. I am hoping to have a go at the three other projects this week, I feel so inspired by Nancy's wonderful ideas.
Enjoy the rest of your Tuesday!
Jane
x

Saturday, 3 December 2011

Something a little bit different....12 days of Whimsy - Day 1 Button Faeries

Good Morning Everyone! I have something a little bit different for you today...I have been wanting to try some different styles of crafting for a while now but never seem to have the time or never Linkreally know where to start. My good Friend Petra is a Master of mixed media and creates beautiful pieces of art which I adore so when she told me about the 12 days of Whimsy and the wonderful tutorials by Nancy, I just had to join in.

The first day of the 12 days was on Thursday and there is a fabulous tutorial to show you how to create these button faeries. I have never made anything like this before and I had so much fun creating this little decoration.
I used an image from this website and die cut a doily from silver card as the base. The butterfly was cut from music sheet and pieced together using two die cuts and distressed with vintage photo ink.
The buttons and flower and gems are from my stash and I added a little pearl to keep the buttons on. I have already made a project for day2 and have just seen today's and will definetely be giving that a go as well! I am off to do some Christmas shopping now.
Enjoy your weekend!
Jane
x